Custom domain configuration in the Publish modal
What is a custom domain?
A custom domain lets you use your own web address (likeyourapp.com) instead of the default created.app address. You’ll need to:
- Own a domain (purchase one from providers like GoDaddy if you don’t have one)
- Have a Create Pro subscription (upgrade here)
- Have an app ready to publish
Important timing notes:
- DNS changes can take up to 48 hours to take effect
- During this time, your domain might not work or might show old content
- If it’s been 48 hours since you’d added records and published your domain, reach out for support
How it works
When someone visits your domain:1
DNS Lookup
Your domain provider checks its DNS records
2
Routing
The records point visitors to Create’s servers
3
Delivery
Create routes visitors to your published app
Setting up your domain
1
Publish your app
Publish your Create app
2
Configure domain
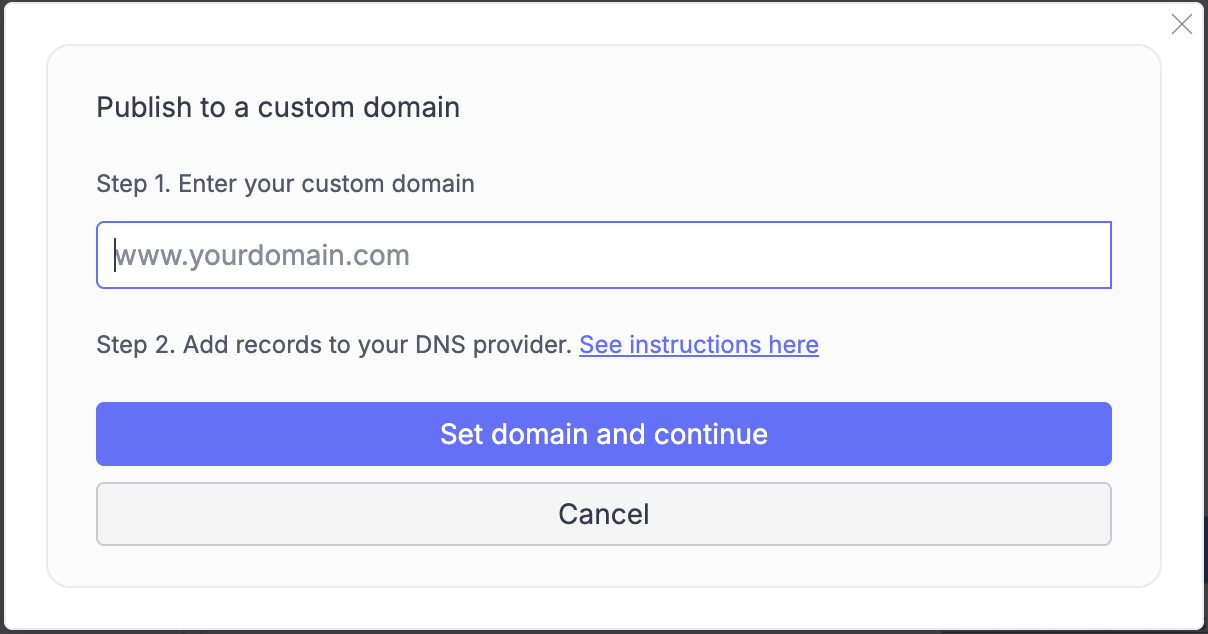
Select “Publish to a custom domain” in the Publish modal
3
Add DNS records within your hosting control panel from your provider
Add these DNS records at your domain provider:
Using a subdomain? For addresses like
app.your-domain.com, just add one record:Provider-specific setup
AWS Route 53
AWS Route 53
Follow these steps to configure your domain in AWS Route 53: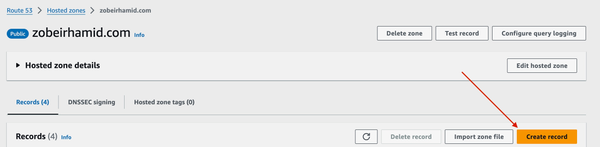 Your final configuration should look like this:
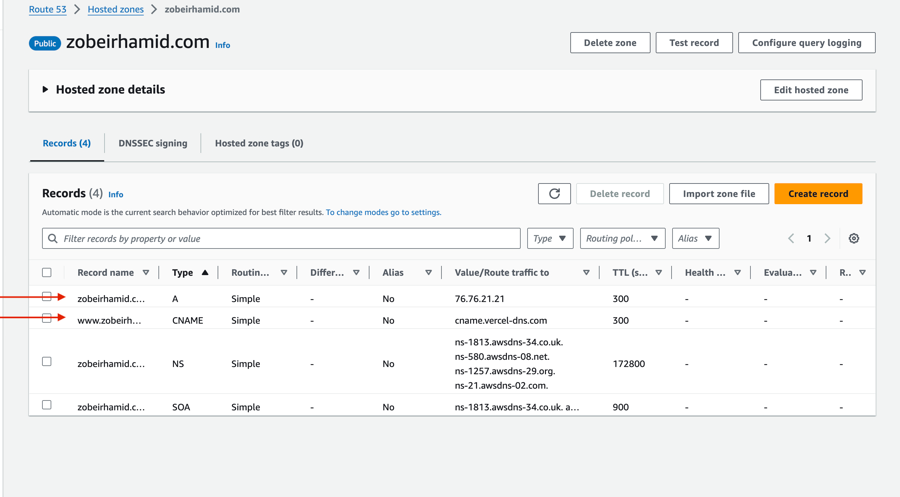
1
Create a new record
2
Configure A record
Select 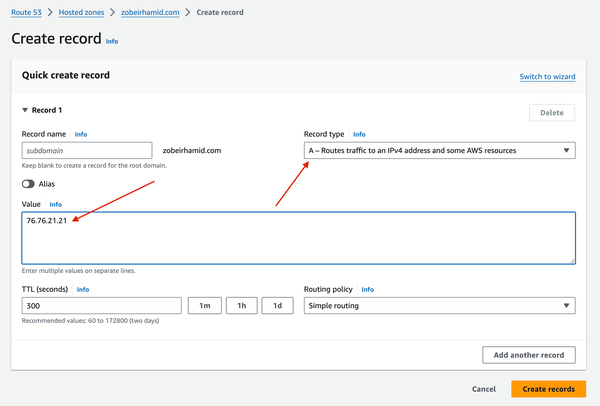
A for the record type and set 76.76.21.21 for the value.3
Create another record like in Step 1
4
Add CNAME record
Create another record with: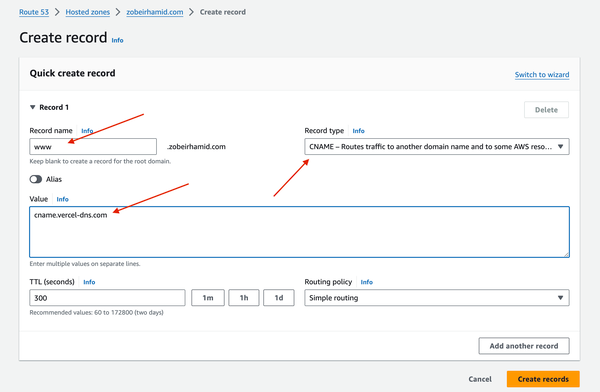
-
Type:
CNAME -
Value:
cname.vercel-dns.com -
Subdomain:
www
GoDaddy
GoDaddy
Follow these steps to configure your domain in GoDaddy: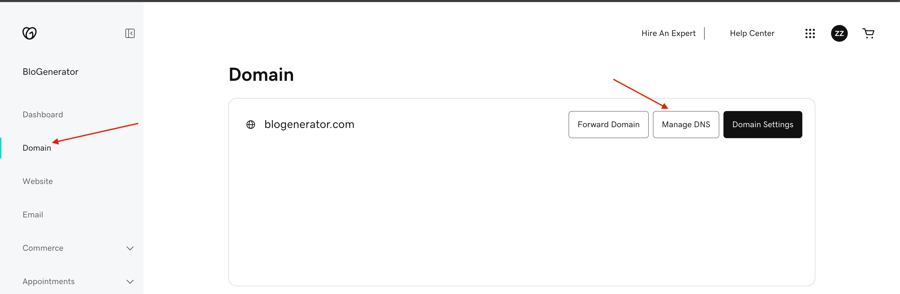
 Your final configuration should look like this:
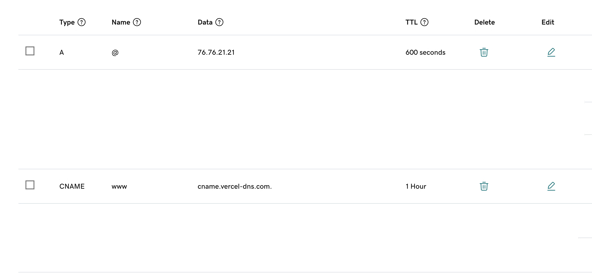
1
Navigate to Domains
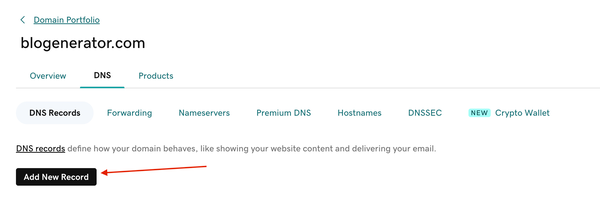
2
Add new record
3
Configure records
Add both the A and CNAME records as shown: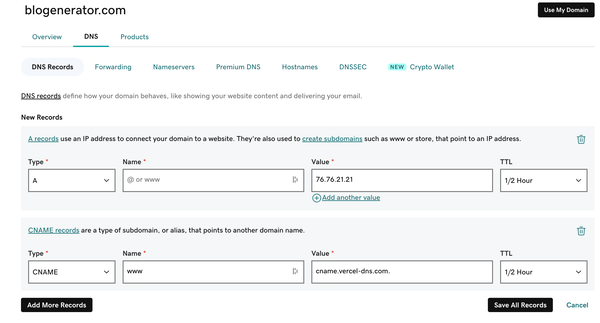
Removing a custom domain
1
Open Publish modal
Access the Publish settings for your app
2
Remove domain
Click “Remove domain” next to your custom domain
3
Clean up DNS
Remove the DNS records from your domain provider