Create a Page
You start with a blank page. To create a new one:-
Logo Menu
in the top left corner > New Page OR press
option-N(oralt-Non Windows)
- Tapping the Project Selector dropdown
- Using the 3 Dot Menu next to the page name
Using Multiple Pages
Consider splitting your app into multiple pages when:- Different sections serve distinct purposes (e.g. home, about, contact)
- Your page code gets long (>1500 lines) - shorter pages help Create generate more accurate code
- You want separate views for different user types (e.g. customer-facing vs admin pages)
- You need to restrict access to certain users
Style Your Pages
Make pages look good using:- Screenshots pasted in chat - see our prompting guide
- URLs in chat - Create screenshots any URL and adds it to context
- Integrations for component packs like shadcn/ui
- Style Guides for consistency
- Components for reusable elements
Add Elements
Use/ command menu to add:
- Components for UI elements
- Integrations for AI services
- Databases for data storage
- Functions for backend logic
After you add an element to a page, if you later update it, you will see a “Elements are out of date” warning in the page. Hit ‘Update’ to update the page with the latest element version.
Publishing
To publish:- Tap Publish in top right
- Choose pages to make live
-
Set routes (e.g.
/about) - Only published pages are accessible
Routes are URL paths to your pages (e.g. yourdomain.com/about). Keep pages private by not publishing them.
Adding Links
-
By hand:
- Make sure you’re in Select Mode
- Tap the element you want to be a link (e.g. a button or card)
- You’ll see a blue outline on the element you’ve selected
- Scroll to the bottom of the chat window
- Choose “Link” in chat
- Pick a target page/URL
- Save your changes
-
By prompt:
-
Publish
your app and
choose routes
for each page (e.g.
/about) - Tell Create what element should lead to the route (e.g. “When clicking the About button, go to the /about page”)
- Create will update the code
- Publish your app to try it out live
-
Publish
your app and
choose routes
for each page (e.g.
Requiring Authentication
You can restrict page access to signed-in users:- Enable User Accounts
- Page > 3-dot menu > Settings > “Require account to view”
- Publish changes
- See content when signed in
- Get redirected to login when not
Deleting a Page
This is not a recoverable action, proceed with caution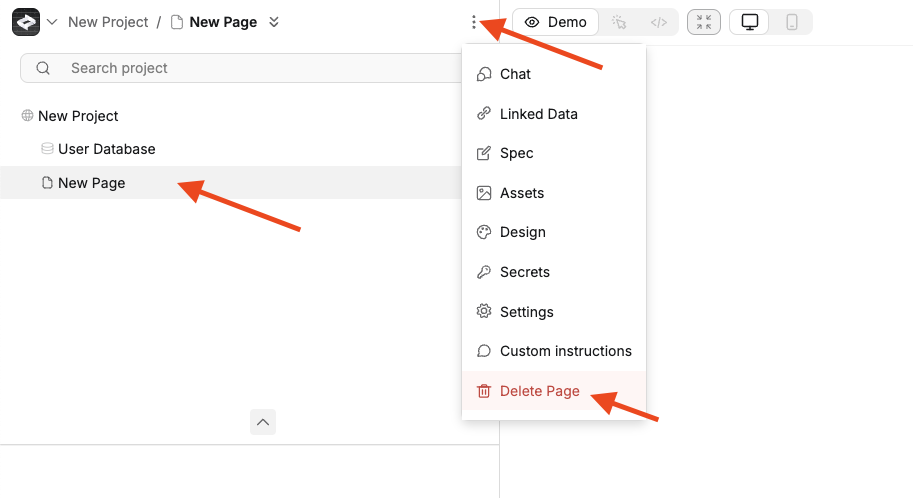
- Select desired page from top level navigation
- Use three dot menu to reveal deletion action
- Click Delete Page